Not hard to imagine that reduced air flow going into the compost is not good for the quality of the compost. To maintain high-quality compost, it's crucial to keep the pipes under the bunker floor clean and free from blockages. Blocked pipes can lead to water accumulation on the bunker floor as the water will not drain, and create anaerobic conditions, harming the composting process. Set up a routine to clean all the pipes thoroughly every three months. Use a hose to flush out any dirt and debris, ensuring proper airflow throughout the composting process.

Ensuring thorough cleaning of the blocked pipes is crucial, as simply flushing them with water from front to back may not be sufficient. Despite water passing through, dirt can still accumulate inside the pipes. Achieving a satisfactory result involves reaching the end of the pipes with a hose and utilizing back pressure to dislodge any remaining debris. Attached below is a picture showing completely blocked pipes and the dirt extracted from some of them. This visual evidence underscores the necessity of meticulous cleaning to maintain optimal functioning of the composting process.

2


When pipes get blocked in composting systems, some issues can pop up. You might see wet spots and areas without enough air (anaerobic zones) in the compost. This happens because the airflow needed for composting gets messed
up. When pipes are blocked, air can't move properly, making some parts of the compost lack oxygen. It will also be visible in the pressure on the bunker floor being reduced. All this isn't good for composting and can cause bad smells and slow decomposition.

It's important to be safe when dealing with blocked pipes in composting systems. Wear a good face mask to protect yourself from harmful gases that can build up in blocked pipes over time. Also, make sure to keep the area well-ventilated and follow safety rules to avoid accidents.

Erik de Groot
This email address is being protected from spambots. You need JavaScript enabled to view it.
https://www.mushroomsconsultant.com

Phase 1: Making Fresh Compost
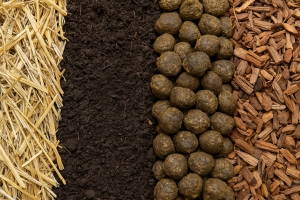
The process of mushroom farming starts with the creation of fresh compost. A balanced mixture of different raw materials, including hay, straw, and poultry manure, is used to create the compost. Proper moisture, temperature, and aeration are key to bringing about the desired chemical reactions within the compost.

Phase 2: Filling the Bunker and Tunnel
Once the compost is created, it is filled into the bunkers or tunnels where they undergo pasteurization and conditioning. The compost temperature is closely monitored in this phase to ensure that it remains within the ideal range between 56 and 60 degrees Celsius.

Phase 3: Mixing Spawn in the Compost
After the pasteurization and conditioning, the compost is ready for the addition of spawn. The spawn is mixed with the compost in one-fourth or one-third ratios to foster the spawn run phase. The spawn run typically takes around 2-3 weeks, where it colonizes the compost with mycelium.

Phase 4: Emptying the Tunnel and Filling the Growing Room
Once the spawn run phase is completed successfully, the next step is to empty the tunnel and transfer the mycelium-colonized compost to the grower room. The compost is evenly distributed and leveled out to prepare for the onset of mushroom growth.

Phase 5: Mushroom Development and Harvesting
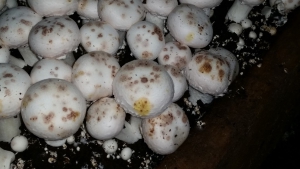
During the next phase, the mushroom pins grow, rapidly turning into mature mushrooms. The mushrooms' development requires strict regulation of the temperature, humidity, and air ventilation to create a conducive environment for growth.
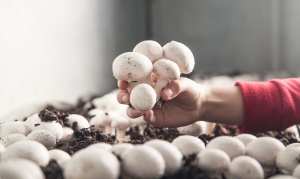
Once the mushrooms reach full maturity, they are carefully harvested by hand. The mushroom picking process requires a high degree of precision to ensure that only mature mushrooms are harvested.

Phase 6: Cook-out, Emptying, and Cleaning
After the harvest, an essential step in the mushroom farming process involves emptying the growing room and cleaning the equipment to ensure sanitation and prevent contamination. The mushrooms are then sent out for packaging, shipping, and sale.

In conclusion, mushroom farming is a complex process that requires attention to detail at every step. From fresh compost to harvesting and sanitation, each step plays a crucial role in producing high-quality mushrooms. By following these steps closely, mushroom cultivators can achieve optimal results and contribute to the ever-growing demand for fresh and delicious mushrooms.

Fred Musc round


Blog by Fred Musc

If one wants to start a discussion with a grower (or with a consultant), start talking about watering.
How much, when and what watering method.

To make any sense though, you first have to define the period. There is watering on casing soil and watering over mushrooms and between flushes.
This blog is about watering on the casing soil during the incubation period. The water given in that period is to bring the casing soil up to the maximum moisture level and to keep the compost at the right moisture.
A good phase 3 compost at the moment of casing will be around 60% in moisture. For white strains that can be up to 3% higher, brown strains prefer 1 or 2% drier. It is not possible to bring the compost to a much higher moisture level by watering it after filling. It is possible to give water into the compost but that will be free water which has to disappear during the fructification period.
2 up to 4 litres of water can be given into the compost at filling or later but that should be the maximum. Even if it is necessary to cool the compost. This can better be done by giving water into the casing and let it evaporate with fresh air and circulation.

Casing soil itself can handle up to 7 litres per m² plus the water that was originally in the casing. To be sure, we talk about a casing containing white and black peat.
More than 7 litres will evaporate, go into the compost or down the drain.
Considering that the evaporation can be around 2 litres per m² per day, the loss with evaporation is about 10 litres. If you count the loss of dripping, the water staying in the compost and the evaporation you come to a figure of about 25 litres of water. In practical situations this means a total amount of water between 20 and 30 litres average. Depending on the farm and the time of the year. Growing drier often means a loss of production and growing a lot wetter means problems in growing, mainly in the outgrow of mushrooms.
Another thing to watch for is the watering method. Make sure that the pressure of the water onto the casing is not too high. Too many times I see a casing with a damaged surface which will give problems in the evaporation.

Every system has a different pressure and if you are not sure, ask the manufacturer. Regularly cleaning of the nozzles is something will help maintaining the right pressure and the right adjustment of the watering trees, looking at distance and height according to the casing level.
Keep watering but do not take it over the top!!

These three principles are the base of disease control on a mushroom farm. To my opinion there is no farm that has not a spot of disease somewhere.
But depending on what is done it will develop into a serious problem or it will stay a hidden time bomb.

If a problem is discovered it is of crucial importance that is recognised. To make sure that will happen training of people on the farm and especially pickers is needed. They are your eyes on the farm.
They need to know the most common diseases and especially in a young stage. Many places of dry bubble are not recognised and are only seen if the disease is in an almost incurable stadium. The small wart on a mushroom or grey spot is often missed.
The same goes for insects. Many growers do not know the difference between a phorid and a sciarid. Although the damage pattern is totally different, so Is the threshold where it really starts costing production. Also the cure is completely different.
Example: growers use diflubenzuron against phorids.
It is only active against sciarids.
If the disease is recognised then it should be isolated. It can be covered on the spot but the most important is to simply keep all doors closed. Check filters and door seals. If a room is infected, make sure the infection is contained in that one room and does not spread on the farm.
After the isolation the disease can be treated. If the spot is detected in an early stage one can do with just a sport treatment. If it is more the whole room should be taken on.
But too often the infection spreads and the whole farm must be treated. Generally room treatment for a full cycle with an overlap of two or three rooms to break the lifecycle of the disease.

So, just a test:
Look at the photo and spot the phorid. Or is it a sciarid?

As the sun's warm embrace blankets the earth, a quiet wonder emerges beneath the forest canopies, in fields, and even in our own backyards. Mushrooms, those enigmatic and diverse organisms, have their own story to tell during the summertime. From vibrant hues to hidden ecosystems, let's embark on a global adventure to explore how mushrooms flourish during this magical season.

1. Bountiful Forests of North America
In North America, the summertime brings forth a bountiful display of wild mushrooms. From the iconic morels to the majestic chanterelles, forests come alive with a myriad of shapes, colors, and flavors. Enthusiastic foragers take to the woods to harvest these gastronomic treasures, while fungi experts study their ecological roles. The diverse landscapes of the continent offer a playground for mushrooms, showcasing the symbiotic dance between these fungi and the trees they call home.

2. European Forests
Across the Atlantic, European forests present their own captivating tales of summertime mushrooms. The enchanting forests of France, for instance, are famous for their delectable truffles. Skilled truffle hunters and their faithful dogs work tirelessly, seeking the precious fungi hidden beneath the earth. Meanwhile, the United Kingdom's woodlands come alive with fairy tale-esque mushrooms, like the iconic fly agaric, adding a touch of whimsy to the landscape.

3. The Fungi Fiesta in South America
In the lush rainforests of South America, a fungi fiesta unfolds during the summer months. These tropical forests, teeming with life, harbor an incredible diversity of fungi, many of which remain undiscovered by science. These mushrooms play vital roles in the ecosystem, breaking down organic matter and supporting the balance of the rainforest.

4. The Magic of Asian Fungi
Across Asia, a rich tradition of mushroom cultivation and consumption has been practiced for centuries. From the revered shiitake to the intriguing lion's mane, Asia's mushroom culture is deeply intertwined with its culinary heritage and traditional medicine. The summertime in Asia brings forth an abundance of mushrooms, enriching the regional cuisine and adding a burst of umami flavor to dishes.

5. Hidden Gems in Australia
Even in the arid landscapes of Australia, mushrooms find a way to thrive during the summer months. Fungi like the desert truffle emerge from the sandy soil, revealing the adaptability and resilience of these organisms. In this challenging environment, mushrooms play a unique role, contributing to the delicate balance of the ecosystem.

From the mystical forests of North America to the rainforests of South America, the summertime mushroom stories from around the world reveal the incredible adaptability, diversity, and significance of these organisms. As we enjoy the warm months, let's take a moment to appreciate the hidden wonders beneath our feet - the mushrooms that quietly remind us of the magic of nature and its ceaseless cycles of life and renewal. Whether foraging for a culinary delight or simply reveling in the beauty of these fungi, the summertime offers a perfect opportunity to connect with the fascinating world of mushrooms.


Lately, several farms have seen some symptoms of virus which means more focus on hygiene is necessary. Hygiene includes all measures aimed at minimizing the risk of disease and pests developing and spreading. The greatest risk of contamination from diseases and pests is at the time of filling and when the harvest starts because from that moment on several people enter the growing rooms, but there are also risks in other parts of the cultivation cycle like during emptying the grow rooms and that got forgotten on many occasions. Much of it is produced by humans and is preventable.

To reduce the chance that a few traces of diseases or insects still survive in the growing rooms after the last harvest day, it is vital to cook out the growing rooms. To ensure that all diseases and pests are killed, it is necessary to heat the entire cultivation room to 70 ° C for 12 hours by means of steam. By entire growing space is meant that the compost also reaches this temperature for 12 hours. Often, out of cost or time savings, it is chosen to shorten the time, or the temperature is kept lower, which has the risk that spores can survive. However, to be sure you kill all spores, 70 °C is the benchmark for 12 hours, especially if there are diseases or pests on your farm.

After cooking out, the new growing cycle starts, so it is important that from this moment on no traces of mushrooms, spores or flies end up in the growing area. This is often neglected during emptying, which means that the usefulness of (costly!!!) cookout has been for nothing. Therefore, when emptying, observe the following rules:

- Make sure that the people who empty the room wear clean clothes and footwear.
- Do not allow unauthorized persons when emptying.
- Always enter the cultivation area to be emptied from the outside, so not from the work corridor.
- If possible, do not pause during emptying, but only when the entire cell is empty, and the large back door is closed.
- Let the people who work at emptying not have breaks in the same area as the harvesters.
- Use only clean and sanitized material.

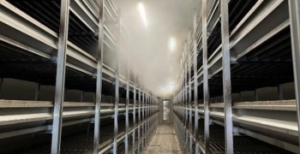
As soon as the growing room is empty, close the large back door as soon as possible. After this, it is important to start cleaning the growing area, shelving, and all used materials with water as quickly as possible, preferably with high pressure. Replace the spore filters, hang new fly plates to catch the first insects, and the cell is ready to be filled. If necessary, you can still disinfect the cultivation area.

Erik de Groot
Global Agriculture Services
This email address is being protected from spambots. You need JavaScript enabled to view it.

Cookies make it easier for us to provide you with our services. With the usage of our services you permit us to use cookies.