


Mushroom training and courses (15)
Higher Filling
Does a higher filling weight give better quality?
The filling weight, i.e. the number of kilos of compost per square metre, should be between 80-95 kg/m2. The general trend is the more compost, the better the mushroom quality. But is that right?
Mushroom growing is all about the difference between air temperature and compost temperature, referred to by growers as activity. Activity is essential to grow good quality mushrooms. As the compost is warmer than the air, moisture is released in the form of evaporation. This caused the mushrooms to grow.
Managing activity
Managing activity is key to mushroom growing. So too much activity, because the filling weight is too high, results in faster, uncontrollable growth. For example, a first flush that produces 8 to 10 kg/m2 of mushrooms on the third day. The quality has been lost. The compost temperature has risen too quickly to 25-26 degrees Celsius. So any added value of filling that extra kilo of compost has been wasted. Say you had filled 90 kg/m2 of compost. In that case a filling weight of 85 kg/m2 would have been a better choice. This makes it easier to manage and control activity.
Casing soil
The casing soil on the compost plays a significant role here. The more activity there is, the more the casing soil dehydrates. This means that more mycelium grows in the casing soil. Dried out casing soil cannot absorb water, and neither can mycelium. What is left is dry casing soil that disrupts the water transport from the compost to the mushrooms. The casing soil effectively acts as insulation blanket. So there is activity, but little growth.
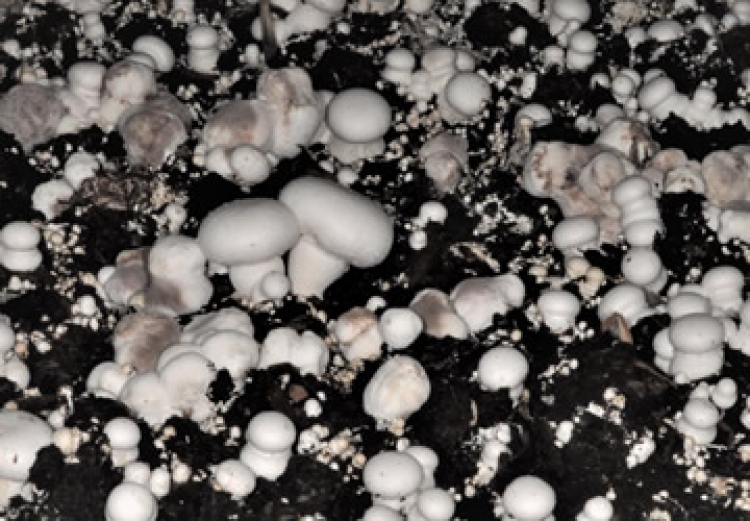
Best production
I see the highest yields and the best quality, from the first to the third flush, in situations where compost activity is well managed and controlled and the casing soil stays soft and wet.
Mark den Ouden
NEW: Live training Mushroom Signals Essentials
Live training combined with e-learning. E-learning offers the basics, leaving more time for individual questions and farm visits during live training!
Organised by Mushroom Office: Mushroom Signals Essentials live training 8-12 June 2020.
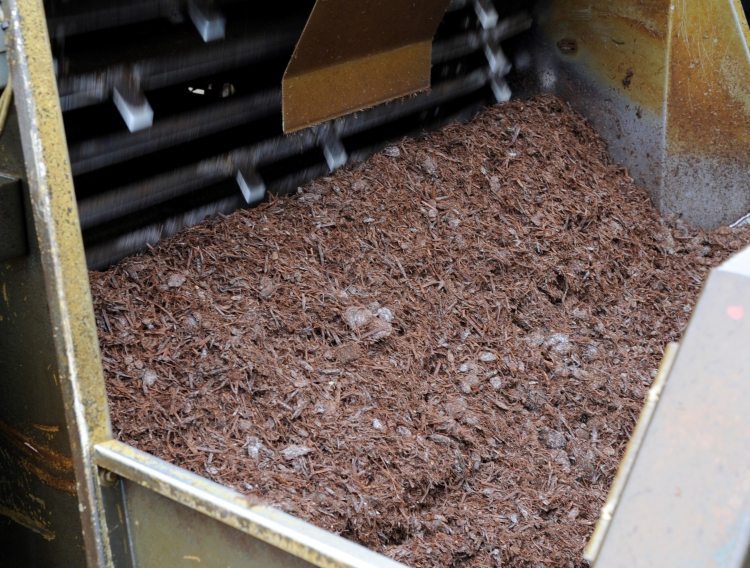
Filling the growing room
How mushrooms grow and the yields are determined at filling. Assessing the compost and casing soil determines the final quality of the mushrooms. After this assessment, the settings are made on the filling machine. Any mistakes made at filling, will haunt you for the rest of the cropping cycle. On larger farms “growers" focus increasingly less on filling. Just a quick look at the compost and casing soil at the start, set the machine… and that's about it.
Why is filling so important?
Compost quality
Compost quality is influenced by: colour, texture, smell, temperature, hard or soft structure. How much water can the compost absorb and should you water at filling? How well will the CAC material grow? Only paying attention during the first 15 minutes of filling is not enough to get these details right. The least you can do as a grower is to be physically present three or four times at filling, to check the compost, casing soil and the filling quality. And have a chat with the filling machine operator.
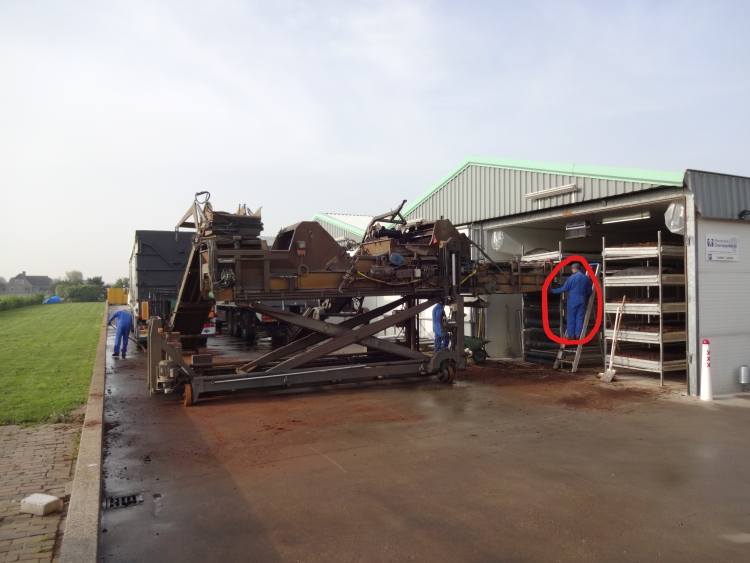
The operator also has to be almost a grower; not only with an understanding of the machine, but also understanding what compost and casing soil quality is and how to handle the raw materials correctly. And not what I keep on seeing more often: filling the growing room with compost and casing as quickly as possible and not paying enough attention to the actual filling process. Sometimes the result is a whole groove along the bed because, for example, there was a piece of wood lodged in the CAC axle. There won't be any mushrooms growing there....
The operator should therefore ALWAYS stand by the filling machine and watch the machine where the compost with casing enters the growing room. The operator should look at the CAC and levelling axles. From this position, you can see what you are doing and stop the machine immediately if anything goes wrong.
Filling is the foundation of further growth. It's not simply completing a task, but also thinking about the quality of compost and casing you are dealing with and how it should be handled during filling and afterwards during growing.
Master class
The next masterclass course will be organised from 9 – 14 March 2020. This course is fully booked!
NEW: Live Training Mushroom Signals Essentials
Mushroom Signals Essentials live training will be organised from 8-12 June 2020.
Live training combined with e-learning. E-learning offers the basics, leaving more time for individual questions and farm walks during live training!
Read more by click on this link
Mark den Ouden
Dry bubble disease
Dry bubble disease may cause a lot of problems because the spores spread quickly. It’s essential to identify and remove the first affected mushrooms to prevent an outbreak of the disease throughout your entire nursery. So how do you remove the first infected mushrooms?
Dry bubble disease is spread by spores. The spores are sticky and are spread by any carrier to which they may adhere, such as people, flies, dust, water, etc.
The best way of preventing the spread of spores is by covering an infected mushroom and removing it. Wet a tissue with a disinfectant such as alcohol or methylated spirits. The spores will stick to a wet tissue. Carefully and slowly place the wet tissue over the infected mushroom without causing any turbulence, which would make the spores fly away. When you have covered the mushroom with the tissue, cover your hand with a plastic bag and pick up the mushroom along with a good amount of the surrounding casing soil. Turn the bag containing the infected mushroom and the casing soil inside out and seal it. Leave the bag containing the infected mushroom in the growing room and dispose of it after you have steamed the growing room.
There are other methods you could use, for example with a plastic bottle. Cut off the bottle’s base, place the bottle over the infected mushroom and fill it with salt.
Whichever method you use, make sure you don’t spread the spores. A single drop of water on an infected mushroom would spread billions of spores over a distance of more than one metre from the mushroom. A few days later you would then see lots of mushrooms showing the first signs of dry bubble disease around that first mushroom.
Regularly check the area from which you have removed the infected mushroom during the next few days to see whether the disease reappears.
More information on how to control dry bubble disease can be found on pages 114-116 of the Mushroom Signals book.
Mark den Ouden
The next Master class Mushroom composting and growing is 21 – 26 October, there are still seat available, more information about the course, click here.
Preserve structure during composting
Longer pre-wetting of straw to preserve structure during mushroom composting
In my 'Pre-wet' blog, I already wrote about the importance of pre-wetting for good mushroom substrate. In this blog, I would like to discuss the structure of straw. I often hear customers say: "We are shortening the pre-wetting time because the structure of the compost is too short." But I disagree with this statement. Why? Read all about it in this blog.
If the straw has a shorter pre-wetting period, the micro life is less likely to damage the hard wax layer of the compost. The idea is that the straw and, therefore, the compost stays longer.
The problem lies in the machines that process the straw. Proper mixing is done by rapidly rotating shafts that pick up the compost and spread it mixed, to optimise blending. Hard straw breaks in these machines, however, which results in shorter structure.
Further opening up the straw, by way of a longer pre-wet or by adding an additional dose of water a few days after the start of the pre-wet, softens the straw. Softer straw breaks less easily and therefore retains more structure.
Conclusion
We can compare straw with spaghetti. If we want to put spaghetti in a small pan, we can break it and it will fit, but the structure becomes shorter. Allowing the spaghetti to warm up a little first makes it soft, so you can get all the spaghetti into the pan without breaking it.
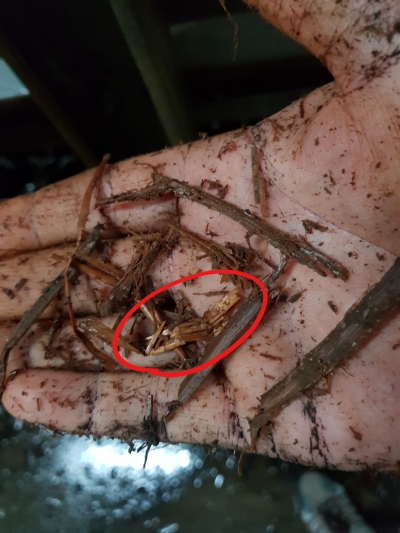
Nutrients
If the growing room is filled while there are still yellow straw sprigs in the compost that have not been opened up, this is a problem. The water is not absorbed by the compost; and in addition, the mycelium literally cannot grow in the straw. This prevents the mushrooms from getting any nutrients from the straw. You also continue to see the same yellow straw sprigs in the compost in the second/third flush. Non-opened compost only provides filling weight, but the mycelium cannot feed the mushrooms from it.
Mark den Ouden
More question about composting? Follow the Master class of Mushroom Office, given by Mark den Ouden and John Peeters. From 29 April – 4 May, see more information, by click on this link.
Casing soil
Why is casing soil used? There are two main reasons: 1. the Pseudomonas putida bacterium; 2. to regulate evaporation. Mushrooms will not grow without evaporation. The casing soil structure, through the depth of casing and on the surface, is the factor that determines how much water can absorbed and released. This is also known as the water buffer. How can growers influence this effect?
Properties
Casing soil is made up of peat. Peat consist of many small and larger pores which act as communicating structures that affect the flow of water. The very tiny (micro) pores absorb water very slowly, but retain it for a long time. The larger (macro) pores can absorb water faster but release it again very quickly. In good casing soil, both properties are necessary: rapid absorption of water: during mycelium growth and after harvesting, and slow release: during pinhead formation and out grow, and when the mushrooms are harvested.
Air
What is the secret of casing soil? Ensure that the moisture content of the casing soil is good. With “export” casing soil, you have to apply enough water and mix the casing with a loader or bobcat. Ask the supplier for instructions and follow them correctly. This has already been done with casing soil delivered in bulk and ready to use. Casing soil is sensitive to structure loss just before it is applied. If the casing soil is compacted or compressed, the “air” will be squeezed out. This effectively closes off the very crucial micro pores. The casing soil will feel harder. During transport and filling avoid compacting the casing soil too much, for example when using augers, over-filling the hopper on the filler or in front of the levelling axle during filling.
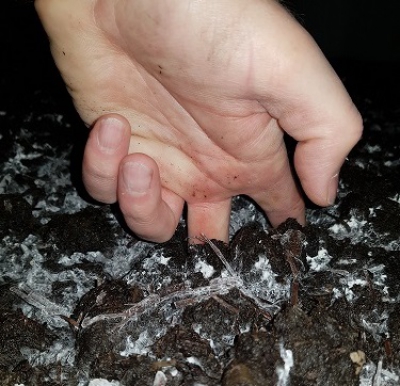
Soft
Casing soil should feel nice and soft. Straight after filling, push your finger into the casing soil. You should be able to plunge your finger in easily and without resistance. Experience will teach you how to feel the difference. A good layer of casing soil after filling is about 6 cm thick. The amount ordered is much less, around 4.5 cm. The rest is air, and these air pockets can largely be filled with the water necessary for the mushrooms to grow!
Mark den Ouden
Mushroom Office
Master class course Mushroom composting and growing is 18 – 23 February, there are still some seats available! Please contact This email address is being protected from spambots. You need JavaScript enabled to view it. ASAP if you want to join! Next course will be 29 April – 4 May.
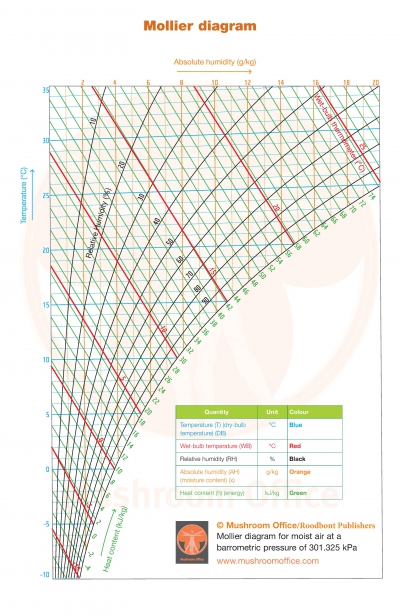
Mollier diagram
What is the absolute moisture content of the air? Or the enthalpy of the air? More and more growers have a handy app that reads out these values. I always ask: “What do you do with this data?” I don’t always get an answer. Because it’s not about the numbers. The best way to understand this is to use a sponge as an example. It’s much clear and you can combine it with the Mollier diagram. Use this link to download the coloured Mollier diagram (pdf).
A sponge?
Air can be compared to a sponge. As air cools, it shrinks. This means its holds less moisture. The same thing happens if you squeeze a wet sponge. So how does this work in the Mollier diagram? Trace the blue line straight downwards and the diagram will literally show you what happens. The temperature drops and the RH rises. Following the lines in the Mollier diagram gives you insight into what happens to the climate. Simply reading values in an app doesn’t give you the same understanding. My philosophy is to draw lines on the diagram. Doing this will teach you much more about the effects on the climate that just reading some figures!
Conclusion: download the Mollier diagram and place it close to the climate controller so you gain a better understanding of what the climate controller does. If this doesn’t work, there are two options:
The basic settings in the climate controller are incorrect. In my consultancy role I often ask: “Why is the growing room climate set this way?” The answer is sometimes: “The computer controls and regulates the climate”. But who controls the computer? You do, so you have to understand how it works! If not, ask your advisor or installer for help.
Or
You don’t understand fully how the Mollier diagram works. For a good, step-by-step explanation take a look at chapter 6 about the Mollier diagram in the Mushroom Signals book. This chapter clearly explains all the principles of how to read and understand the diagram.
Mark den Ouden, Mushroom Office
Master class course 22-27 October is almost fully booked, next course 18-23 February 2019!